At a glance
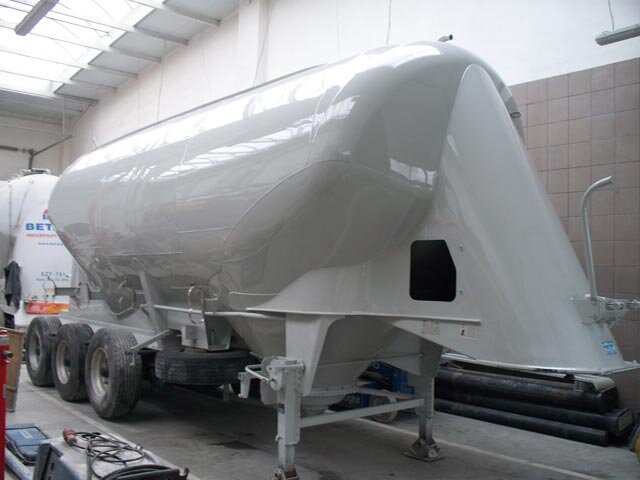
Paint renovation is the final stage of an accident repair of a silo trailer : blasting to Sa 2.5 cleanliness, epoxy primer, two coats of PUR 2K and restoration of ADR markings and logos. The paint is the anti-corrosion protection of the tank and frame, not cosmetics. We work in our own booth in Chorula (silo trailer up to 13 m). Ask for a quote.
Paint renovation — completing the accident repair
After all the mechanical work (frame straightening , tank welding , axle replacement ) — the silo trailer needs an external paint renovation. This is not cosmetics — the paint is the anti-corrosion protection of the tank and frame, critical for years of service.
PHS Magnum has a dedicated paint booth in Chorula (a complete silo trailer up to 13 m long). The full package from blasting to final markings.
Renovation procedure — step by step
Step 1: Removal of fittings
Before painting we remove components that:
- Could be destroyed (plastic covers, rubber seals, labels)
- Could get covered in paint (valves, pressure gauges, cables)
- Could obstruct access (protective covers, ladders)
The disassembly is documented — all components are stored in crates labelled with the trailer number.
Step 2: Sa 2.5 sandblasting
Blasting is the key stage for the durability of the entire coating. The Sa 2.5 standard (ISO 8501-1):
- Removal of all contamination, surface corrosion and old paint coatings
- Surface after blasting: bright metallic, uniform
- Roughness profile: 50-75 µm (optimal for primer adhesion)
- Abrasive: steel shot or corundum depending on the trailer material
Non-negotiable: every old paint layer left under the new one = a future delamination risk. Hence Sa 2.5 rather than mere mechanical cleaning.
Step 3: Epoxy priming (60-80 µm)
The first layer after blasting — anti-corrosion epoxy primer.
- Composition: epoxy resin + hardener (2K system)
- Mixing time: 5-15 min from adding the hardener
- Pot life: 4-8 hours
- Drying: 24h at room temperature, 4-6h at a forced 45°C
- Layer thickness: 60-80 µm
The epoxy primer provides:
- Excellent adhesion to metal
- Basic anti-corrosion protection
- A base for the top coat
- Mechanical strength
Step 4: Sanding + base coat
Once the primer has dried:
- Light sanding (P320-P500 paper) to prepare the surface
- Dust removal with compressed air + alcohol cleaning
- Application of the base coat (in multi-component systems)
Step 5: PUR 2K top coat (80-100 µm, twice)
The main coat — two-component polyurethane:
- Excellent UV resistance (colour does not fade for 10+ years)
- High chemical resistance (cement dust, chemicals, fuels)
- Mechanical hardness (scratch resistance)
- Gloss or matt to the customer’s requirements
Application:
- First layer: 80-100 µm
- Drying 24h (or 4-6h at 45°C)
- Second layer: 80-100 µm
- Final system thickness: ~250-300 µm (primer + 2× top coat)
Coating system build-up — overview
| Layer | Function | Thickness | Drying |
|---|---|---|---|
| Sa 2.5 blasting | metal preparation, roughness profile | profile ~50-75 µm | — |
| 2K epoxy primer | adhesion + anti-corrosion protection | 60-80 µm | 24h / 4-6h at 45°C |
| PUR 2K top coat — layer 1 | UV and chemical resistance | 80-100 µm | 24h / 4-6h at 45°C |
| PUR 2K top coat — layer 2 | coverage, gloss/matt, hardness | 80-100 µm | 24h / 4-6h at 45°C |
| System total | complete protection | ~250-300 µm | — |
Forced drying in the booth (45°C) shortens each layer’s cycle from about 24h to 4-6h, returning the vehicle to service faster without compromising bond quality.
Step 6: Markings and logos
Once the paint has dried:
Mandatory markings:
- Orange ADR plate (where a hazard class applies)
- UN number + hazard class (for dangerous goods)
- Vehicle registration number
- Data plates (tank, chassis)
Commercial markings:
- Customer’s company logo (UV-resistant 3M / Avery Dennison self-adhesive films)
- Contact details (phone, email — where requested)
- Internal fleet number
Safety markings:
- Warning stickers (high voltage, pressure vessel, etc.)
- Identification numbers for the driver (for fast loading)
Step 7: Quality control and handover
- Visual inspection of the entire surface
- Coating thickness measurement (digital dry-film gauge)
- Adhesion test (tape test, cross-cut to ISO 2409)
- Photo documentation
- Renovation report for the vehicle file
Special requirements
ADR trailers
Renovating ADR trailers requires:
- Certified paint systems with ADR approval
- Markings compliant with the ADR agreement (colours, fonts, placement)
- Documentation from the sticker/label manufacturer
- An ADR inspection before return to service
Food-grade trailers
For food-grade trailers — the external paint can be standard (the external surface does not contact the foodstuff). BUT — when renovating the tank interior (after internal accident damage) — passivation of the stainless steel and a cleanliness certificate are required.
Chemical trailers
Documentation of the paint’s compatibility with the transported medium is required (where external contact through a leak is possible).
Contact
After an accident, or for a planned coating renovation of your silo trailer — send photos of the damage and we will prepare a written quote for you and your insurer. Ask for a quote.
Tel: +48 504 788 385
biuro@magnumchorula.pl
We accept vehicles from Poland, the Czech Republic and the DACH market (DE, AT, CH). Quotes based on photos are prepared remotely. Base: Chorula near Opole, Poland.